Follow Us
Subscribe to our
Newsletter

Cosplay Advice
Advice to beginners


2. See how others may have interpreted your cosplay.


3. For your first cosplay, stick to your comfort zone.
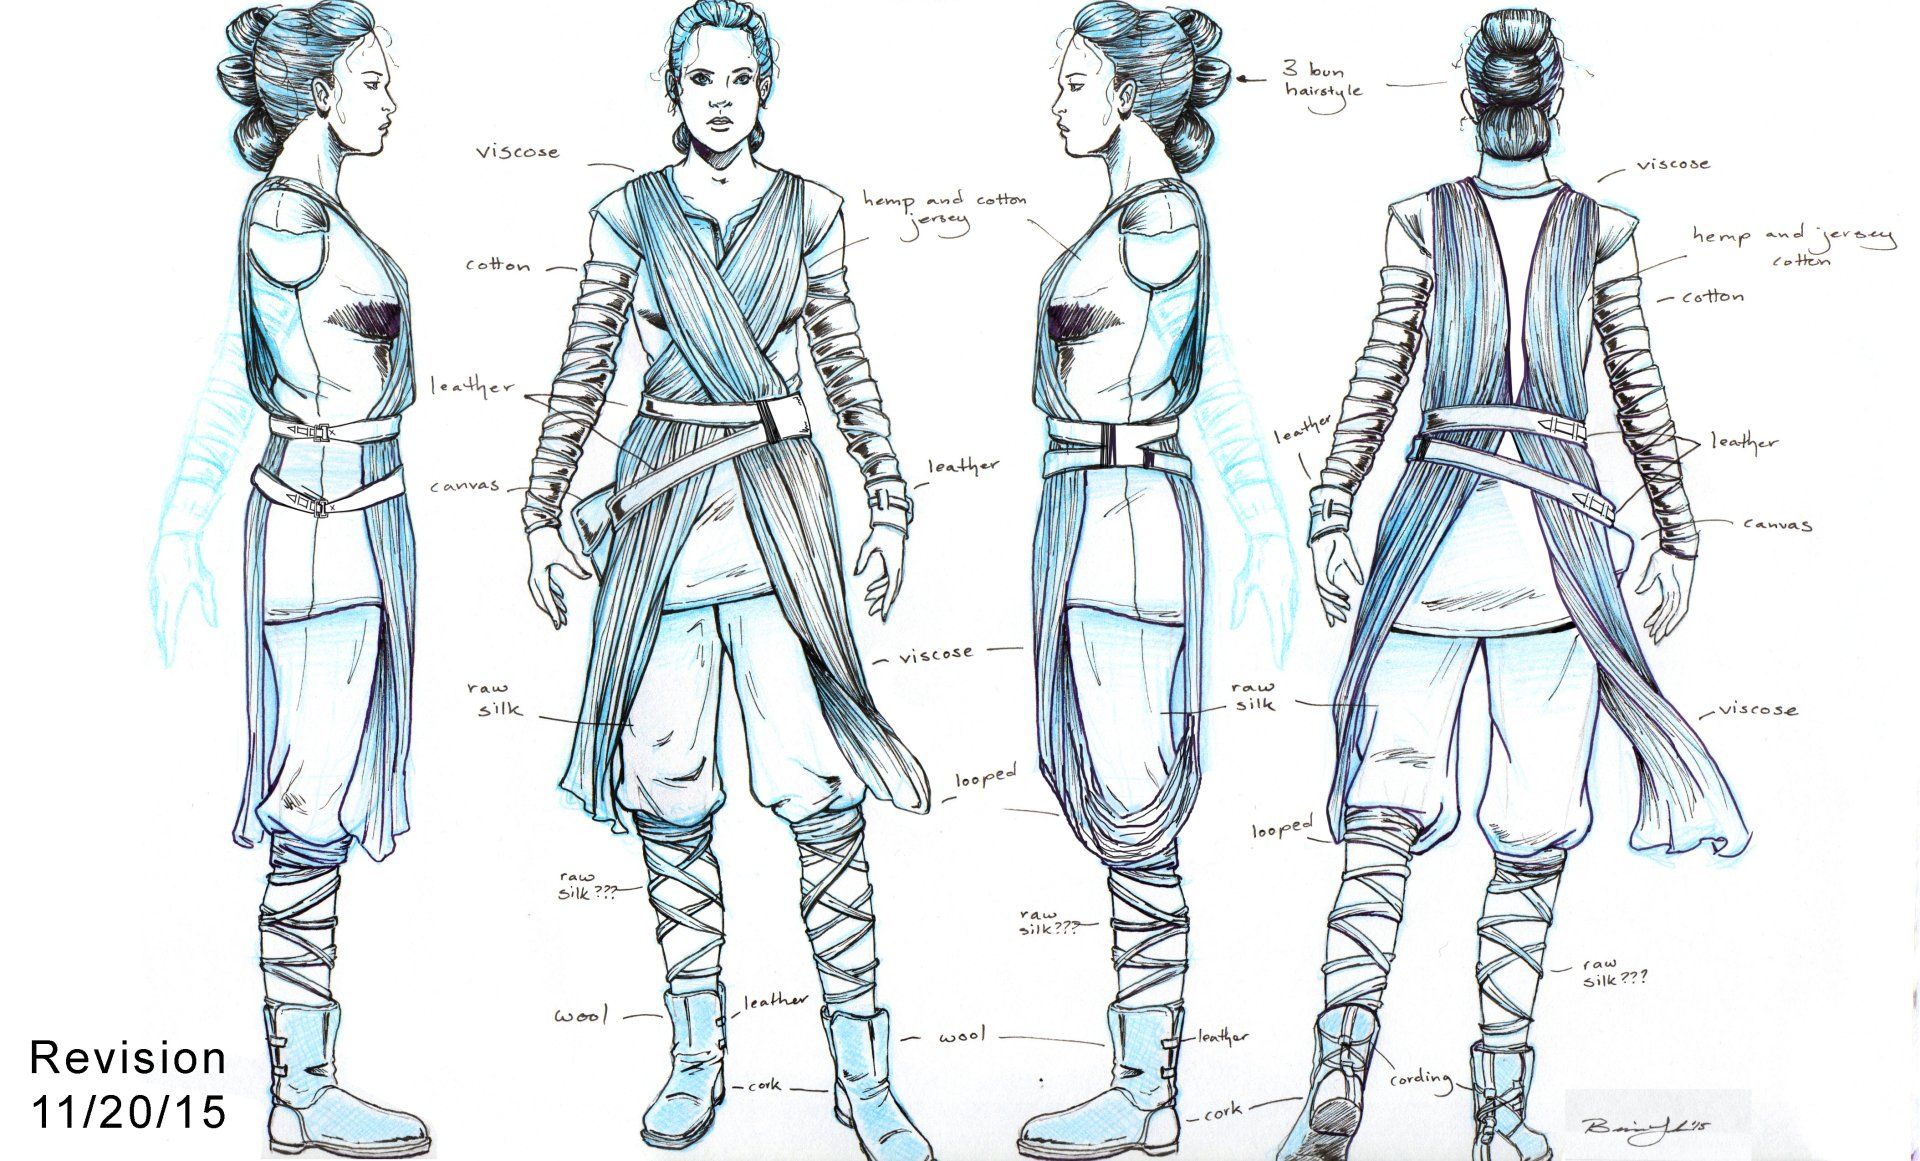
4. Really observe what you are working on.
Sometimes the camera doesn't get every angle of the cosplay. Make sure you do your research so you know you can have every piece of the cosplay covered. Looking up concept art of the costume really helps as well.
Example: Here is the Rey concept art for her scavenger outfit in "The Force Awakens"
5. Second Hand Stores , Charity Shops are your best friends
UP CYCLE YOUR WAY TO COSPLAY - Thankyou to Kim A
I know things are tight money wise for a lot of people nowadays, heck even I find it super hard to afford it sometimes what with only working part time. But I have a couple of ways that people can cosplay on a tight budget and still get great results. Both of these ways I use a lot and i will illustrate both with pictures of what i made with them.
The first is to upcycle something old. Obviously depending on what character you want to cosplay depends on what you’ll need. When i wanted to cosplay Jill Valentine in a tactical uniform i had pondered the use of a real tactical vest, but as so very often happens i was hit with bills that i had to pay leaving my cosplay budget pretty weak. So my answer to this was to upcycle. I went to my local charity shop and i bought a zip up body warmer that was black. This only cost me £3, it looked something like this (unfortunately I couldn’t find
any before pictures).
I bought some luggage straps from the local camping shop and then i began to mod. I took the long zip out of it cut it down so it sat just under my chest (I wanted a small half tactical vest for my design) then i re stitched all the edges and then i sewed the straps running all the way around the jacket back to front so that the clips were in the center at the front, leaving a slight gap so my tee was visible. I sewed a couple of loops out of the straps and attached those so that i could clip my walkie and my badge on. I sewed a small square of leatherette (which didnt cost more than £1) to the back and then i had a decal made from eBay which was only a couple of pounds
and attached to the back and then i had a very cool looking tactical vest for under £10 which is really cheap considering the alternative, and i got a really good response to this costume, one person even said that I was the best resident evil cosplayer they’d seen which made me smile at the time. The rest of the costume was also from upcycling old things, i used an old black tee and sewed some patches the shoulders, a pair of black combats, and a beret all from charity shops, things i had or was given a long time ago. The whole costume cost like under £20 minus the boots, which i couldnt get in a charity shop they cost me £9.99.
Another example of where i have upcycled old clothing into a costume is in the form of my Ryofu Housen cosplay. Again i went to the charity shops and bought a red blazer and a pink plain skirt. Then with the jacket i changed the buttons and painted the collar part black that needed to be. With the skirt all i did was paint the red lines on with fabric paint and there you have it! I had another great cosplay for less than £10.
This is a great way to make cosplay items for a fraction of the price. But I know that you are not always going to be able to find the item of clothing that is needed to modify into your cosplay, which is why I use my second method of upcycling a lot. BEDDING! Charity shops have a lot of great bedding that sells for really cheap and this can be used to make your costume. Its not just for costumes though, i have used this method to make casual clothes that i wear on a daily basis.
An example of this upcycling is one of my very latest cosplays that i wore to the MCM expo in London thats just gone. My Poke ringmaster Penelope cosplay. One lovely girl even came up to me and my sister at the expo and asked us where we got the fabric to make the costumes and we told her the same thing then, BEDDING!
The dress and the waistcoat were both made from bedding, the dress i just belted and the waistcoat i put colourful buttons on it and painted the pokeballs on the tails and even with buying the plain black top hat and polestyrene balls to make the pokeballs this whole costume also cost less than £10 to make. Even the pikachu on the top hat is upcycled from an old one that was bought from a charity shop. So with this costume it was just a little imagination designing a character and making the cosplay from the bedding. You could get the bedding and make it into the character of your choice from the well known anime, manga etc that you wanna cosplay from. Or like me in this example i found the bedding first and then designed the cosplay around it, which was also fun to do.
all of the costumes above are all ones that i have made by buying old bedding or using old bedding that i already had and making into cosplays.
What i am trying to get at in all this is that even people on a tight budget can create something amazing from something old and no one is none the wiser. Everyone out there has an old tee, or dress, or some old bedding, old hats and old accessories that they can take and with a bit of creativity and work can turn them into cosplay related items! I do it all the time and if you cant afford to buy fabric off the roll its a great way to make what you need on the cheap. I hope people will consider it and give it a try if they are on a budget. I love to see it when all cosplayers come together. I hope this might help some people out there and I hope people have fun trying this.
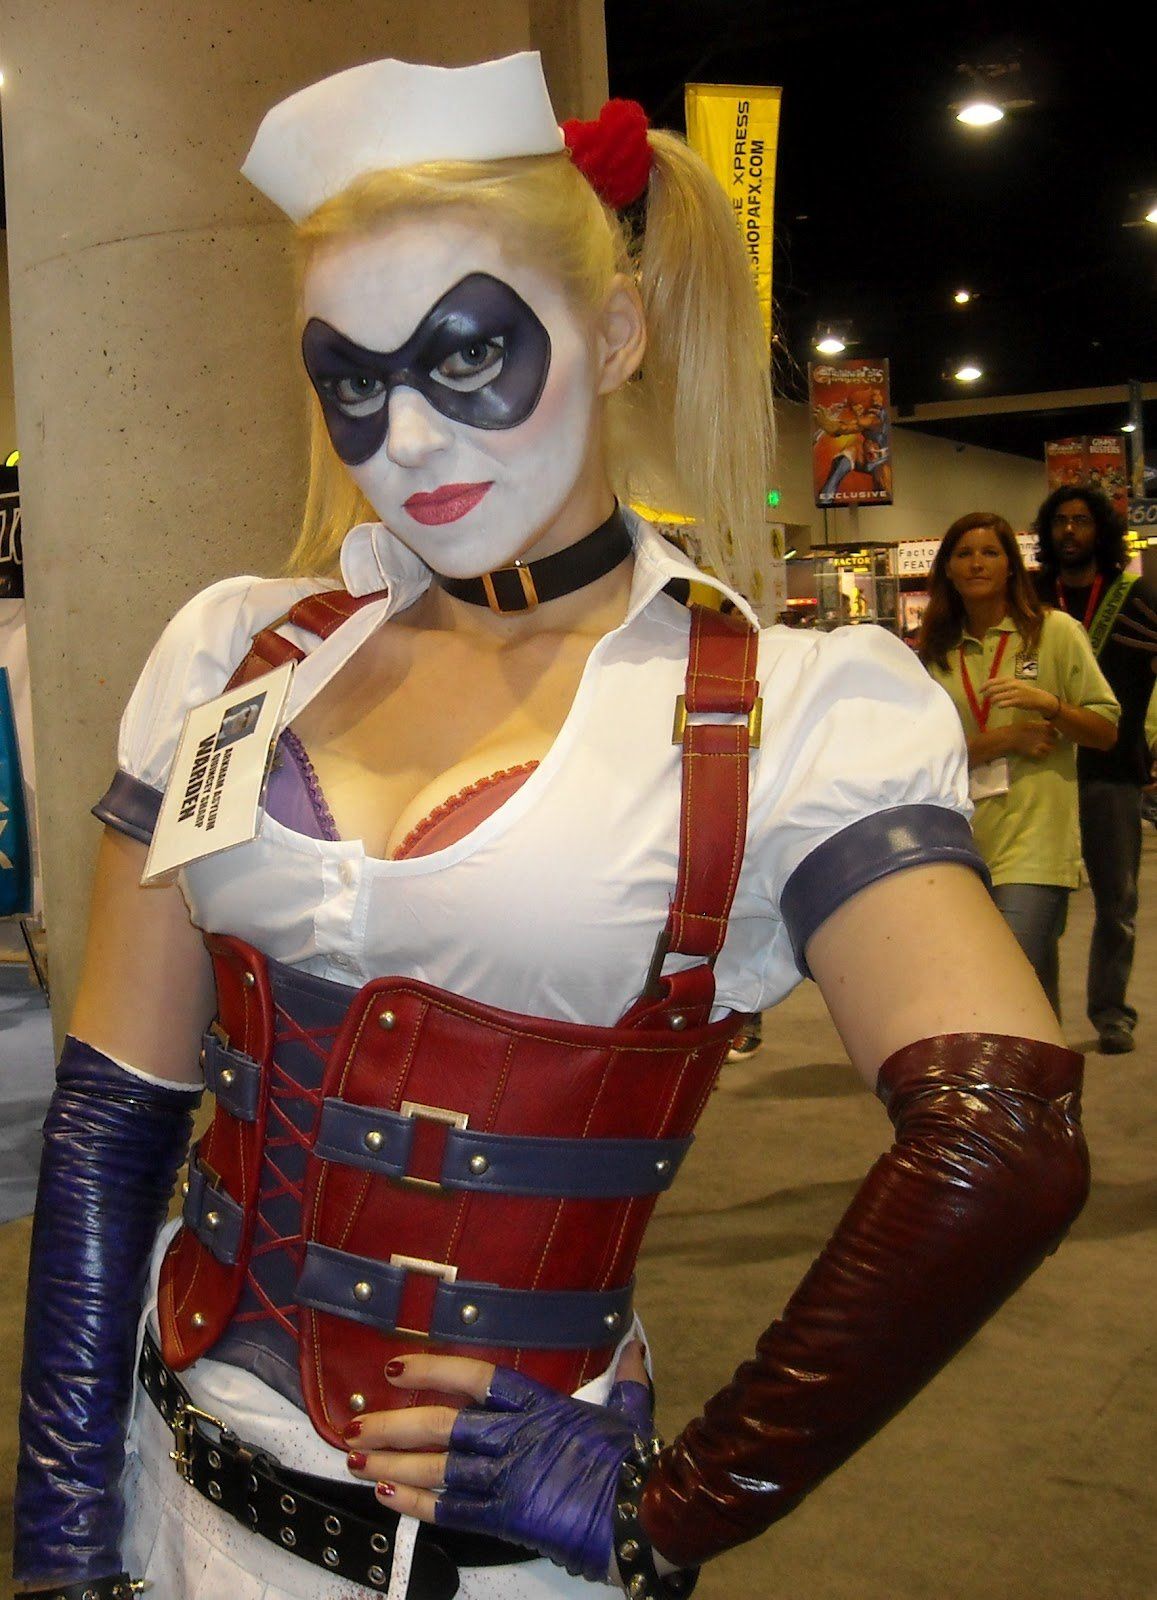
6. Don't forget about the minor details that make your cosplay so special.
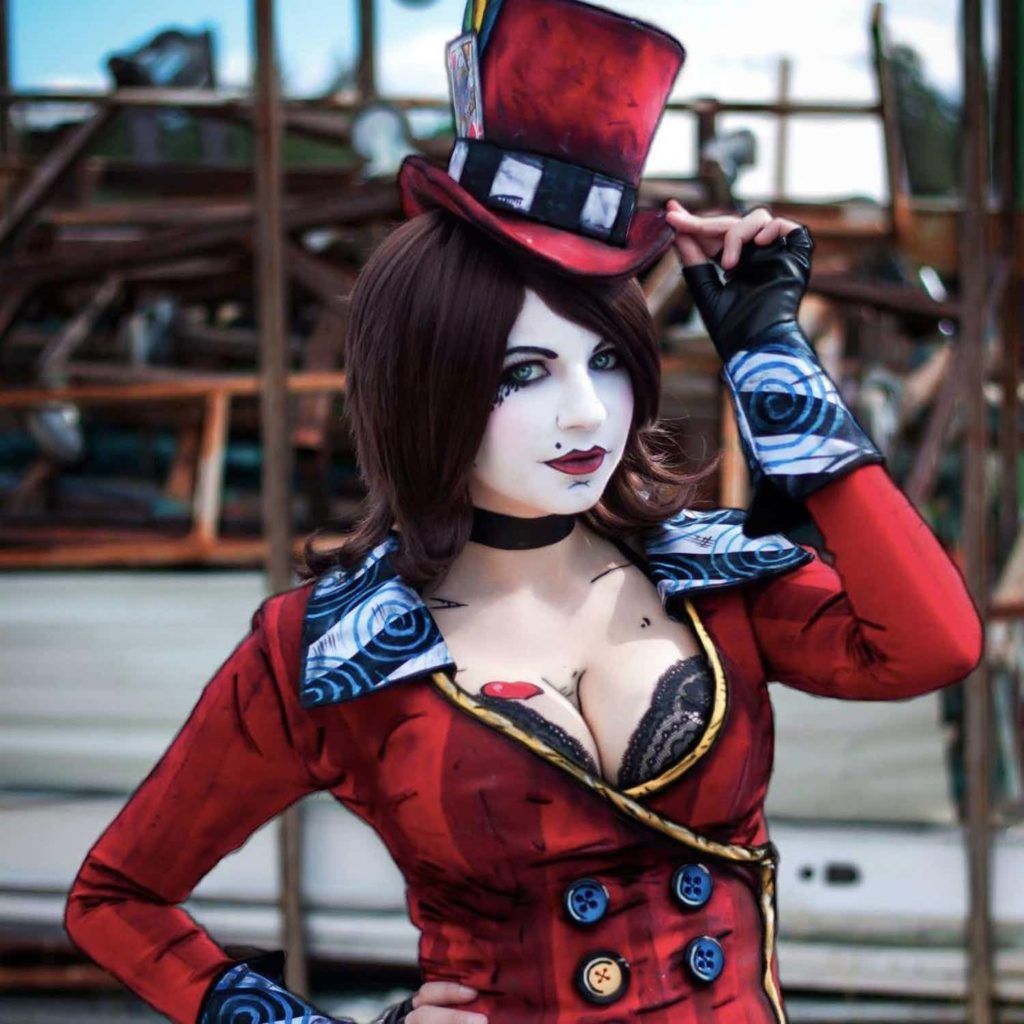
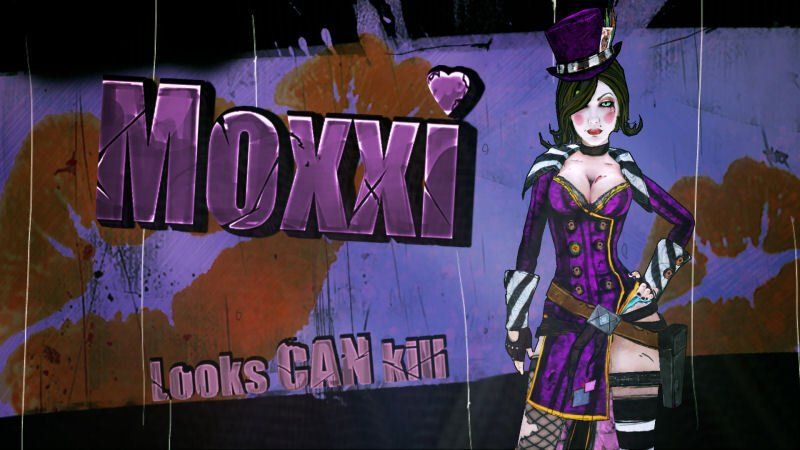
A great article from Lady Fancypants on creating Mad Moxxi !!
A Cosplayer is Born... and Moxxi Part 1 - Spats!
Hello world! I decided to finally get this blog thing going for a few reasons: first, overall I am terribly charming and witty, and the world just must know what I'm thinking (ha ha); second (and more importantly) I finally decided to make the leap and create my first cosplay! No, this isn't going to be just a cosplay blog, but as I have been working through this process - researching, learning, creating - I tried so hard to find accounts of what those before me did, and there isn't much out there in the way of tutorials applicable to the costumes I was creating for my husband and I. MANY people have played Moxxi and Dr. Zed before, but explaining how they did what they did didn't seem to be a priority - I figured, why don't I share!
The first step, of course, was research, so I went in game(s) and took pictures (of my TV) of Zed and Moxxi in every location they appear, and from literally EVERY angle I could imagine. For the record, that wasn't good enough and I've been back a few times since to get a little angle here or a little detail there. I started to gather fabric and notions in about February - plenty of time before con to get everything together - but of course, I kept procrastinating, and every time I set out to get something done, I would wind up discovering there was some little thing I was missing and put it off to another day.
While I can't promise a complete tutorial of every little step, I can definitely explain the steps I followed, where I got the bits, pieces, and fabrics I found, and what I had to do to get them all together (if there's anyone out there reading, and you have questions, feel free to ask!). If it's not clear yet, I tend to be more than I little verbose, so there may be more talky talky than needed, but if you stick with me, I'll give you the steps I followed to make these "masterpieces." Warning: you will need some basic sewing skills AND a sewing machine to make these costumes, but the last time I did any major sewing was eight years ago, and the last time I made a garment was in the ninth grade, a total of thirteen years ago, a sloppy pair of shorts - so there may be hope for you yet!
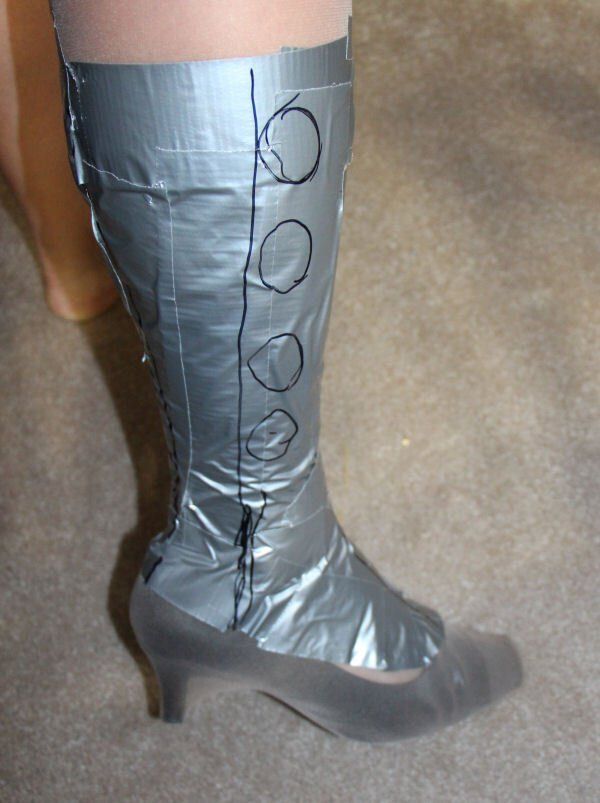
The first piece I actually got around to making was Moxxi's spats (boot covers). In order to figure out HOW to make them, I searched the internets like a boss, and came across THIS lovely tutorial from Festive Attyre for making your own pattern and using it to sew a pair of spats!
Materials necessary, ALL found at my local Fabricland:
-White Fabric (preferably stiff, I used light denim)
-White Thread
-0.5" Yellow Double Fold Bias Tape (I accidentally grabbed single fold. Don't.)
-Matching Yellow Thread
-A seperable white zipper of adequate length (determined based on the length of the spat you want)
-Eight large black buttons
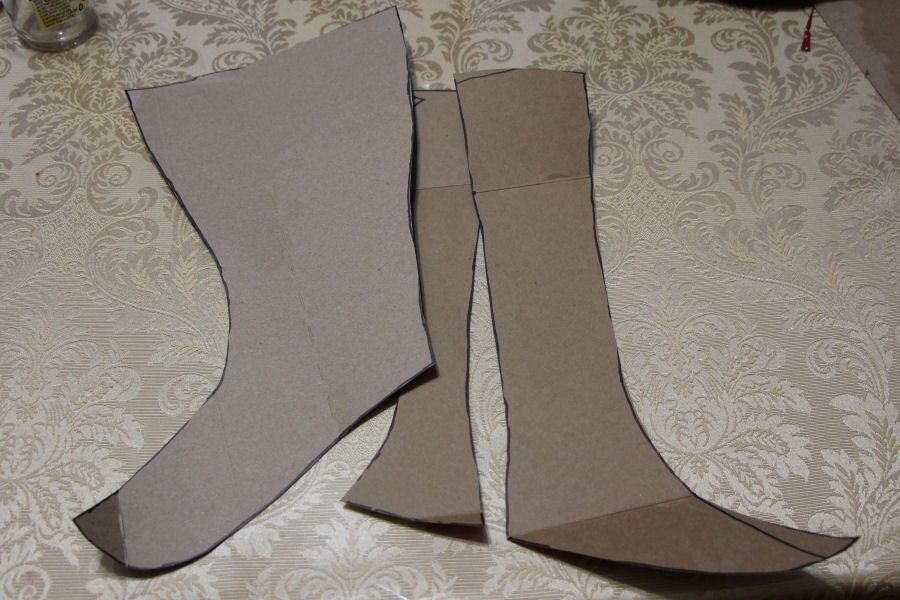
The basics, put on a pair of sacrificial stockings over the shoe you plan to cover, and duct tape where you want the spat to cover. Once you have your duct tape spat built, use a sharpie to draw a line the front and back of the leg, as straight and accurate as possible (using a friend or conscript if you don't feel you can do it yourself). I also added a line down the inside of my spat where I planned on putting the zipper (though I ended up putting the zipper on the outside based on how the item came together). These pieces of duct tape stuck to stocking become the stencil for your pattern! I traced mine on to cardboard, then traced the cardboard stencils on to the fabric - boom! A spat was ready to be born! Don't forget to leave a seam allowance on the edges that will be sewn together, I usually stick with 5/8" or so. Because bias tape will be applied to the outer edge, you don't need to leave any extra allowance on the top or bottom, unless you want a little extra space to ensure the fit, just remember to cut it down to exactly where you want your spat to fit before putting the trim on.
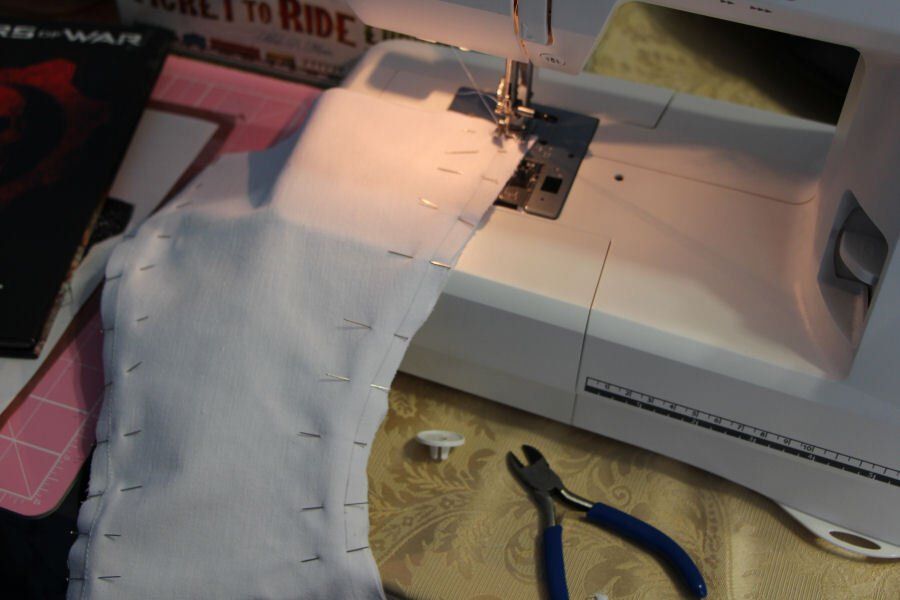
I pinned the pieces together, and sewed up the front and back. It was at this point that I determined how long my zipper needed to be by measuring the length of the pieces I needed to attach. Applying the bias tape was a pain with the single fold, but with double fold, it would be simple. Pin the bias tape around the edges, and sew it in place. Take care on the curves, fold as necessary to get the tape to conform to the shape of the toe. I ended up putting it around the entire edge, and then attaching the zipper underneath the bias tape on the outside of the spats.
Once the bias was on, it was button time! I tried to match the spacing as closely and evenly as possible, though the buttons were a bit small. Finally, I sewed a wee bit of black elastic on to the bottom of the spat to stretch under the shoe and keep the bottom edge of the spat in place.
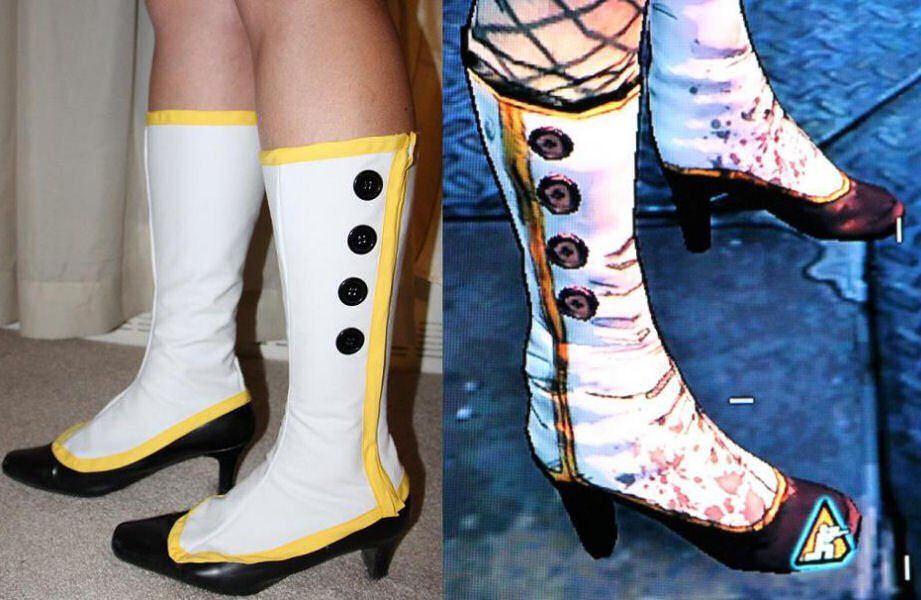
aaand voila! Spats! The fun part - cell shading and adding blood spatter - will come later ;) The only things I would change are: the buttons, I ended up making the rest of the buttons out of polymer clay, and intend to make matching ones for the spats before my next wear and I would most certainly use double fold bias tape, no matter how far I needed to search for it! Stay tuned for more!
This was only part one of twelve and was just designing the Spats!!
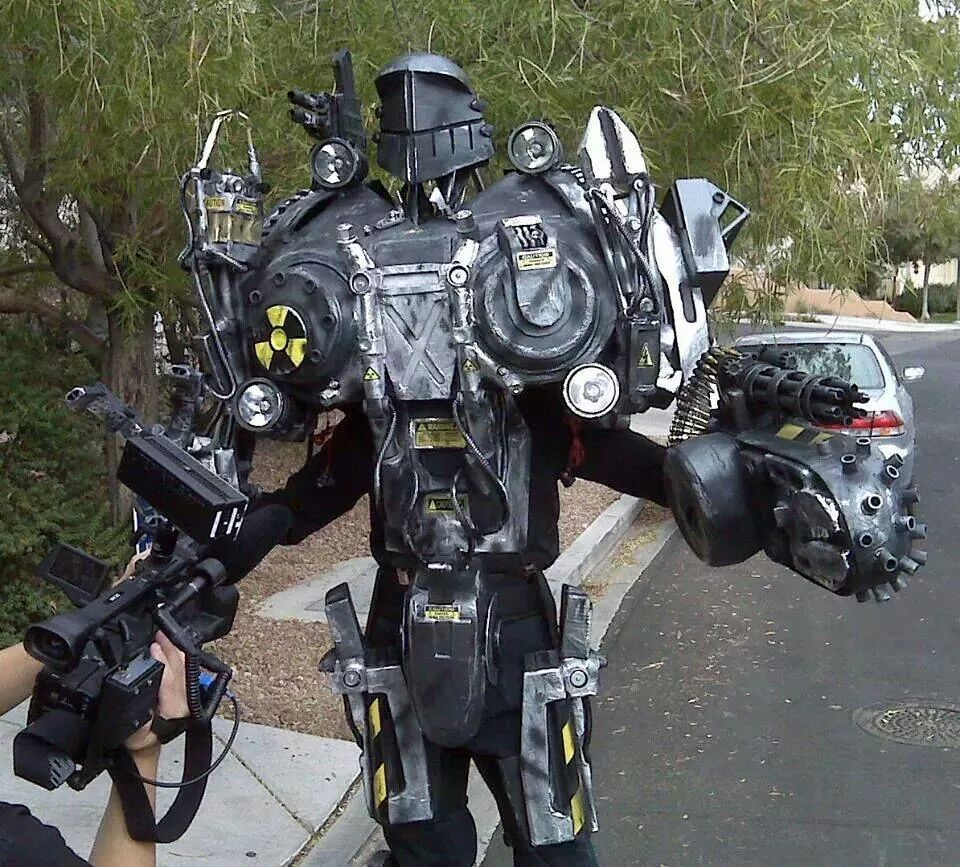
7 . Make sure you make a outfit you can move in easily ----- look below !!
Where do I get my Cosplay
8. Always have scissors, needle, and thread on hand when working.
9. No thread? Dental floss works too!
It worked perfectly for when my mom sewed on my girl scout patches and it works perfectly with cosplay.
10. Make sure to take some time out of your day.
Don't get frustrated about how long your cosplay is taking. Make sure that if you are going to work on anything that you have an allotted amount of time to work on it, while remembering to take breaks.
How to Make Cosplay Costumes
Putting together a cosplay costume can be fun way to celebrate your favourite , video game, movie, or comic book series and show off your creativity in the process. First, choose the character you want to become. Then, study detailed images of your character and make a note of their clothing, hairstyle, accessories, and other important features. Familiarizing yourself with your character’s appearance will help you shop for components that look the part, or fashion your own one-of-a-kind items at home.
Choosing a Character
1
Make a list of possible characters that you’re interested in cosplaying. Come up with a broad selection of characters, drawing inspiration from many different forms of media. For example, you might pick out 1 or 2 characters from various entertainment categories, then narrow down your choices to the one that you think is the most fitting or will be the most fun to realize.[1]
- In order to choose the perfect cosplay character, first think about what you like. What is your current obsession? What sorts of things do you most enjoy watching or playing? Questions like these can help you pinpoint a character that best represents your interests.
- The character you cosplay could be from a TV show, movie, video game, anime, comic book, musical group, or even real life.
Tip: Don’t feel like you can’t dress up as a certain character because they’re a different ethnicity, gender, or species. With cosplay, you’re free to be anything you want to be![2]
2
Decide which version of the character to portray. Once you’ve made up your mind on a character to embody, give some thought to the specific costume design that you like the best. Many characters have more than one outfit or look that they’re known for. This means you have all sorts of options to choose from even after you’ve committed to a character.[3]
- If you’re planning on cosplaying Vegeta from Dragonball Z, you might stick with his regular Saiyan armor, or go with a less common variant like his sleeveless blue training outfit or casual pink shirt and yellow pants ensemble.[4]
- People will be more likely to recognize you as the main version of your character, but exploring alternate costume ideas can give you the chance to do something unique.
- You’re also free to invent your own totally original costume concepts by blending themes or elements from different titles and genres, such as Jedi Harry Potter.[5]
3
Study images of your chosen character closely. Analyze every part of your character’s appearance in depth, from their clothing and hairstyle to their secondary features like weapons, armor, accessories, and tattoos. You’ll need to have a detailed picture of these things in mind moving forward in order to construct a costume that’s complete and accurate.[6]
- Search the Internet for high-res screenshots that clearly highlight every part of the costume. If you can’t find any good full-body shots, try saving multiple photos that show the character from different angles.
- There are plenty of 3D models for video game characters available online. These can come in handy for crafting costumes, as they they offer a full 360-degree view of the character.[7]
4
Settle for a costume that you can actually pull off. While there’s theoretically no limit to what you can create, some costumes will be easier to bring to life than others. It’s easy enough to decide that you want to be Iron Man, but making it happen is a different story. Keep in mind that you’ll be responsible for buying or making all of the components of your costume.[8]
- Don’t forget to consider logistical factors, as well, such as when and where you’ll be sporting your costume. An enclosed bodysuit with a helmet, gloves, and heavy boots may just be too plain hot to wear to a convention in the middle of summer.
- Challenges can fuel your creativity, but if you can’t think of a good way to make your costume a reality, you may have no choice but to scrap your original idea and go back to the drawing board.
How to Make a Poison Ivy Costume
Who Is Poison Ivy?
I'm going to show you how to make your own Poison Ivy costume for Halloween, but first I'd like to introduce you to the greenest Halloween costume around.
Poison Ivy is sexy and diabolical. This seductress was once Dr. Pamela Isley, a botanist with a background in toxicology.
She was once human but now she is half-woman, half-plant, and 100 percent lethal. Ever heard of the kiss of death? She has it. Stay away from this redhead because her first kiss is deadly. Her second kiss can save you—but chances are you won't get that far. Her touch is also deadly, so if you see her coming, you'd be smart to make yourself scarce.
Poison Ivy loves plants, and she believes they have the right to live without being harmed. She can communicate with plants; she can intuit what they feel and they will help her whenever they can. She takes her convictions to a new level with her powerful touch or kiss that will kill you. She thinks men are the weeds in her Earthly garden, and she will do whatever it takes to protect her "children," which she considers the plants to be.
What Is Poison Ivy's Story?
Funded by Wayne Enterprises, Dr. Pamela Isley was a botanist who loved plants and was researching ways to protect them. Working alongside her boss, Dr. Jason Woodrue, she was experimenting with poisonous venoms and fluids, but her experiments were failing.
Dr. Woodhue, it turned out, had his own agenda. As Dr. Isley formulated different poisons he would take samples of each one. Dr. Woodhue found Dr. Isley spying on him one day, causing him to attack her. He knocked her out and left her lying in the poisons and venoms that she had been experimenting with. It didn't kill her—but it did make her crazy. (You've heard the old saying, "what doesn't kill you makes you stronger?") But more importantly, it transformed her into the villainess we all recognize today as Poison Ivy.
Choose Your Poison (Ivy Costume, That Is)
Take a good look at all the costume pictures on this page and then read over all of my tips for how to assemble different variations of this costume. You can choose a costume exactly as it is shown in one of the photos, or you can take pieces from each costume and combine them to make your own unique look for our villainess.
It will be challenging and rewarding to put together your own costume look this year. I love the cape, so I would include that in my costume. There are so many great ideas to pick from. Pants, skirt, or dress? Leotard base? How about that cape? Will you choose clothing in the same green color or go for different shades of green? You've got a lot of decisions to make!
You can find ivy wraps that wrap around your thighs, stockings with an ivy pattern right on them, and lots of other great ideas. Be sure to look at all the pictures when you are planning which outfit to make.
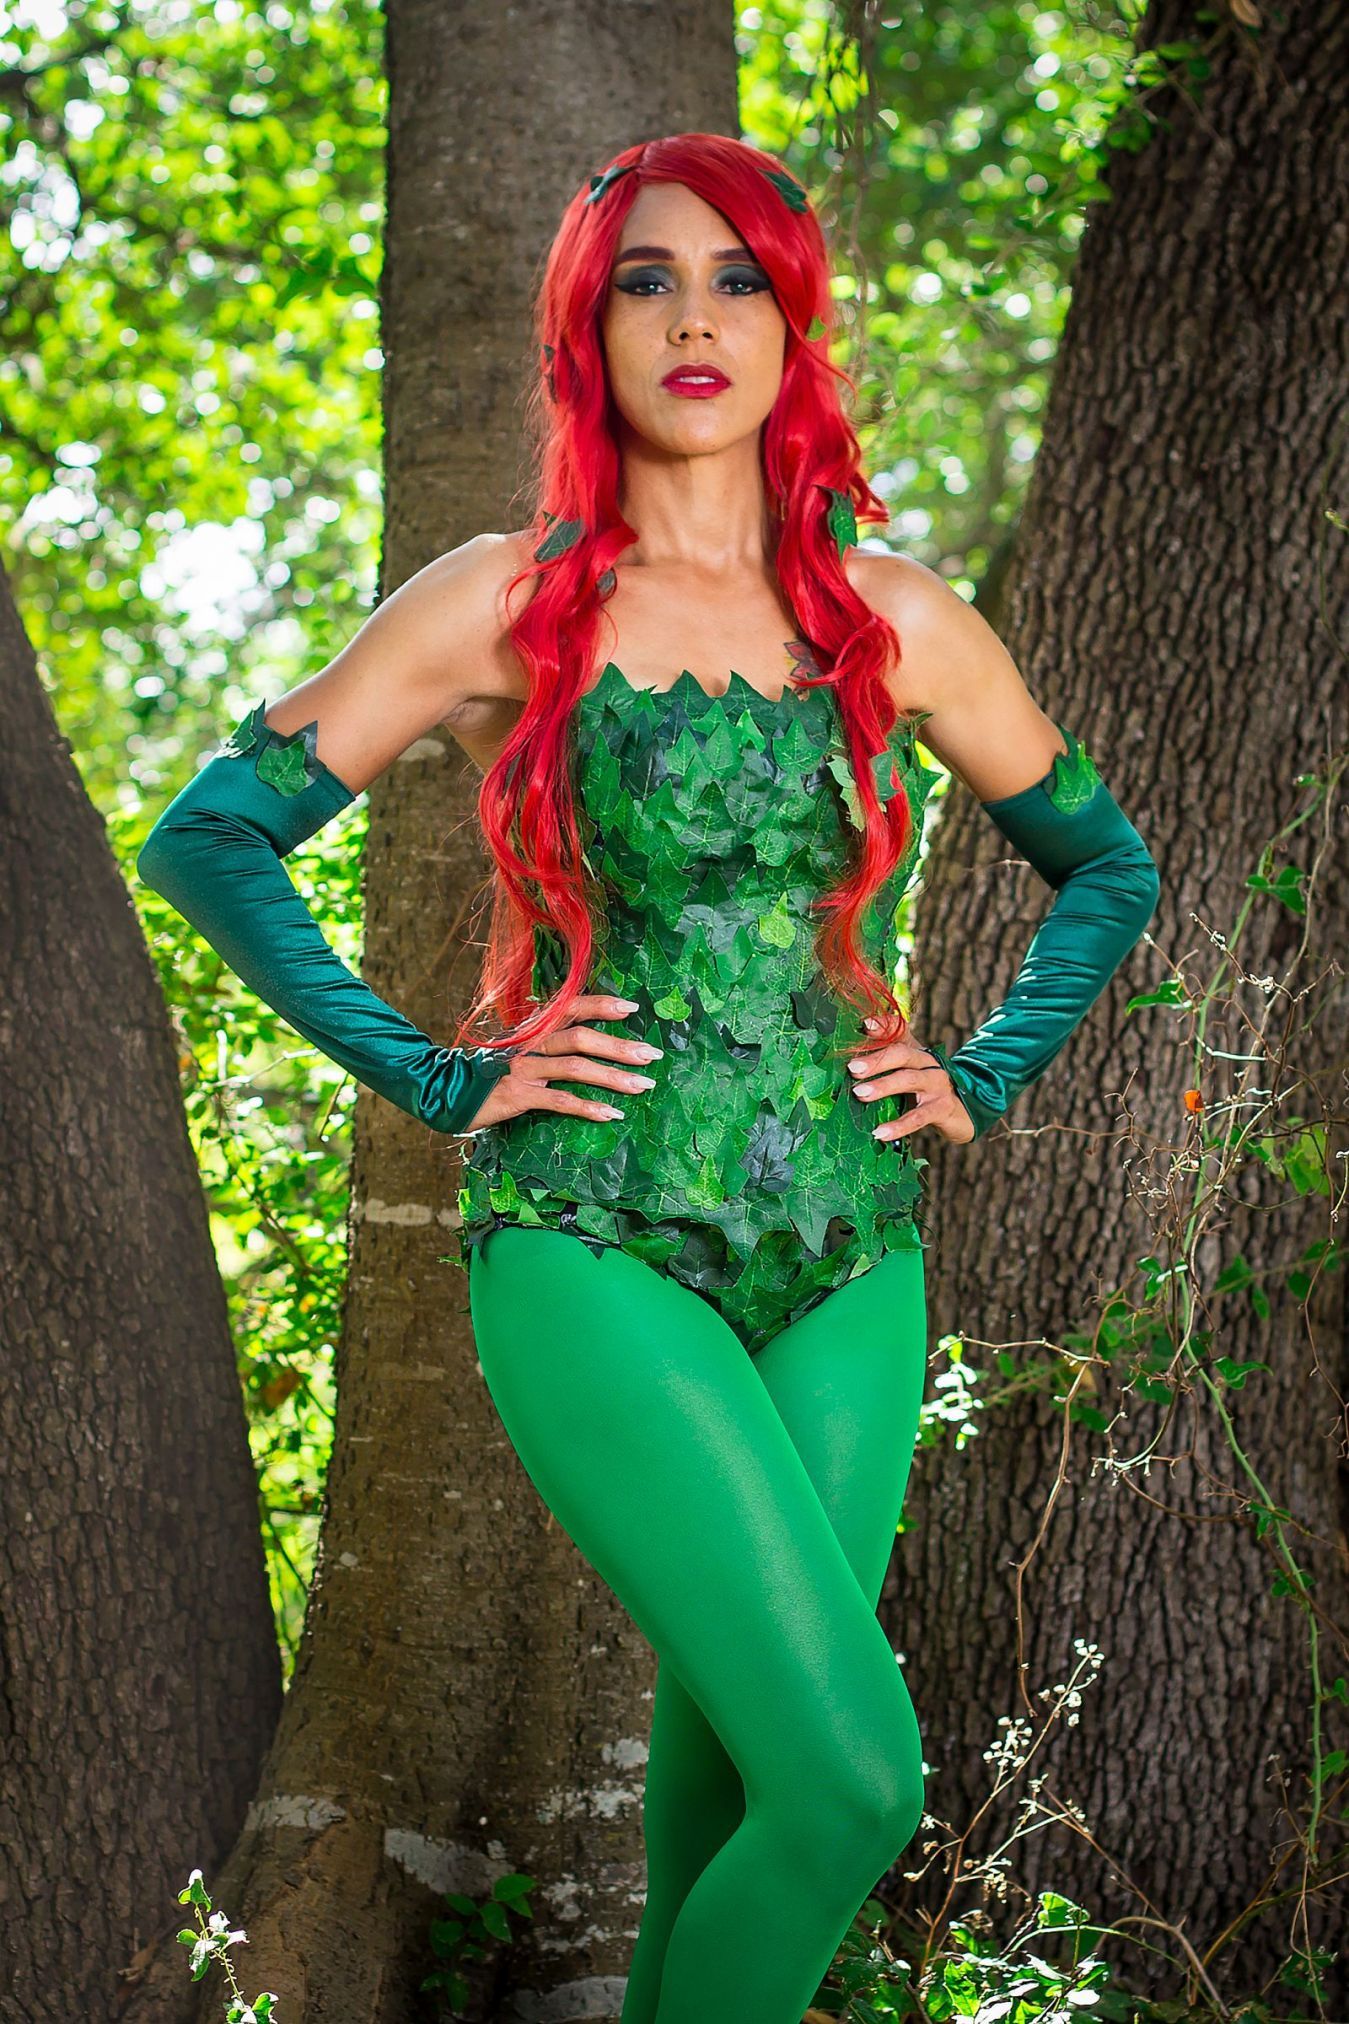
DIY Poison Ivy Costume #1
You can see from the pictures on this page that Poison Ivy is dressed all in green and everything has ivy leaves on it. Her hair is a lovely shade of red—and yes, I'm biased since I too am a redhead.
Here's what you will need to make this easy costume at home:
- Green leotard or spandex jumpsuit or dress
- Green tights (they can be fishnets if you can find them)
- Green silk leaves that look like ivy (to attach to the outfit)
- Needle and thread or hot glue gun and glue sticks
- Green headband (optional)
- Green gloves (optional)
- Green cape (optional)
You can decide if you want to wear a top and pants, a dress, a leotard, or a jumpsuit-style costume. Take ivy leaves and glue or sew them onto your top, your pants, and leave some for your hair, too. The cape and hairband are optional. Sometimes Poison wears long green gloves—personally, I like that look, but since it's your costume I leave that decision up to you.


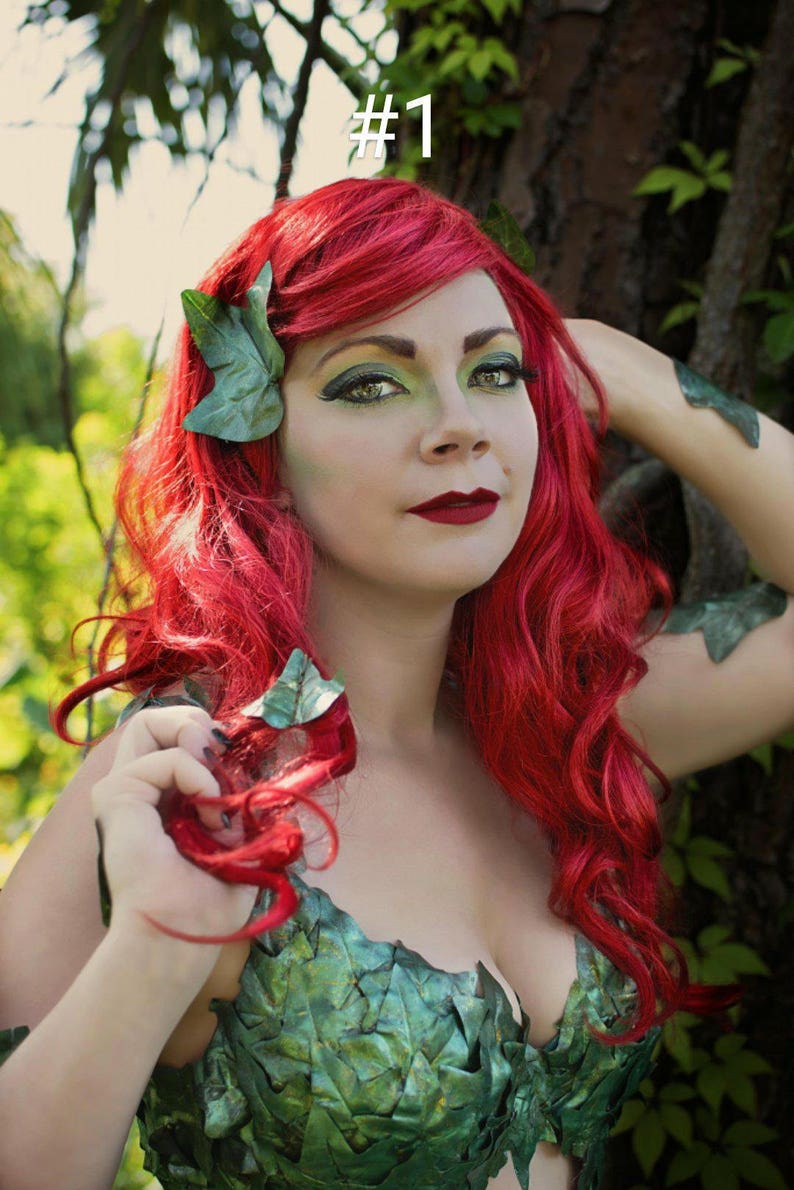
Poison Ivy Makeup Ideas
Poison Ivy's makeup, like her costume, is green, and ivy leaves are a must-have. You can create some really interesting looks when you dress up as this gorgeous villainess.
- Hair: Her hair is thick, long, and red as can be.
- Skin: Her skin is green and has leaves growing out of it.
- Colors: Lots of shades of green. Some for your face, neck, and shoulders. Some for your eyes.
- Eyes: Get a green eyeshadow set so you have different colors to experiment and shade with. Take a look at one or both of the makeup tutorials I have posted below.
DIY Poison Ivy Costume #2
To make the spandex Poison Ivy costume
- Green spandex fabric
- Tape measure
- Pins
- Needle, thread, and sewing machine
- Strands of fake ivy leaves
- Scissors
- Hot glue gun and glue sticks
- Green tights
- Snaps (for the crotch)
- Black shoes or boots
One of the questions under the video is about how to go to the bathroom in this costume, which is why I added snaps onto the supply list. Just thought that might be a good idea. You have to decide and figure it out since this will be your costume!
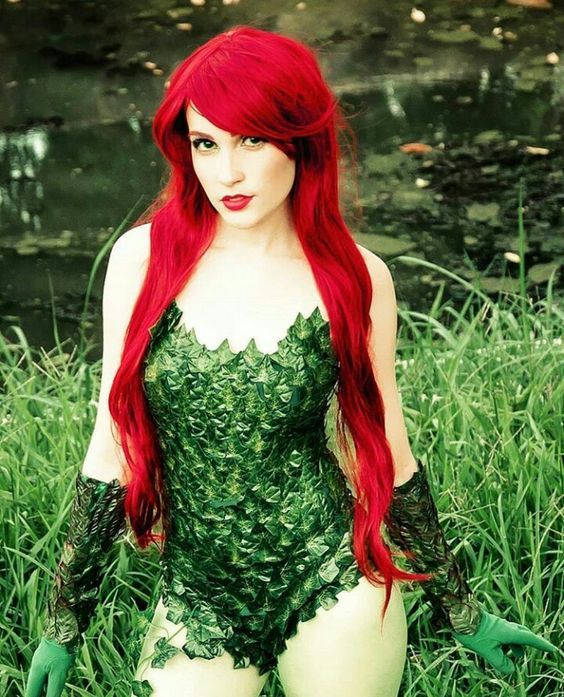
DIY Poison Ivy Costume #3
To make the Poison Ivy costume in the video below you will need:
- Black corset
- Black bottoms (the video uses high-cut briefs)
- Green opera gloves
- Green tights
- Lots of fake ivy leaves
- Black shoes or boots
- Hot glue gun and glue sticks
This is an easy costume to assemble. Check out your clothes closet and drawers before you go out shopping. Make a list of the clothes you will need and check your room and any old clothes you have stored up in the attic. If you don't find it all at your house, try a local thrift or consignment shop.


How to make your Cosplay Costume
Selection of movies on the right on how to make your Cosplay Costume , If you need individual advice please email us
Subscribe to our
newsletter

Subscription


We are a Professional Comic Trader with over 42 years experience in the Comic World . We are a leading CGC Agent , We find Comics for Customers , Press , Buy and Sell , Clean and Restore , Value and Grade etc